Bathroom is an integral part of any apartment in a block of flats or private home. Interiors and plumbing may be different, depending on the size of the room.

Shower without tray – the original choice for small bathrooms. The spacious rooms other than the bathroom, also place the shower area.
May independently make this option without assistance. Just you need to delve into the intricacies of installation, because mistakes are costly, the water can not fully be displayed when the system fails, you can flood the neighbors, or opening the door of the shower, where the floor is not even the minimum roll, the remaining water will spread along floors.
Ladders are divided into several types:
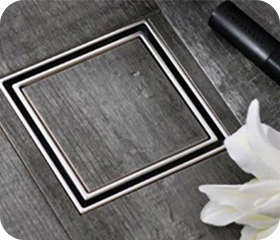
- Dot – the compact ladders mounted in the center of the room or in a corner, also at the walls. Affordable.
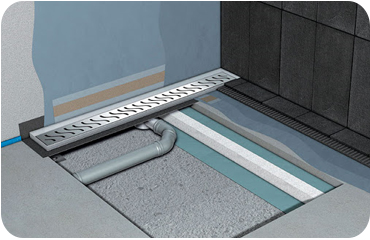
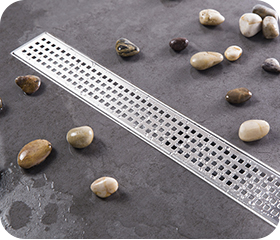
- Linear – differ from the point size of the body. It has an oblong rectangular shape and large capacity. Mounted near one or more walls.
- Wall - same as linear only are installed in the wall.
When installing a shower area without a tray, consider the height of the room. During the installation of the ramp, floor level raised a minimum of 10 cm.
Originally defined the place of a shower. Then make preparation for a ladder. There are many choices of drainage systems, choose the one that is suitable to the specific conditions of the room.
In private homes often set the ladder with vertical exit because it has a large capacity and you can make any thickness of the screed without fear of the load on the floor, as in apartment houses. Horizontal drainage has a lower height and is great where there are restrictions on the thickness of the screed.
The dimensions of the shower stall depends on the bathroom. In small rooms, make shower 100x100, see Also the size effect figure living in the apartment. To fit large wet room and suitable thin minimal dimensions.
The apartments make the shower area with a podium. According to the regulations can not exceed the load on the slab. In private houses there are no such restrictions and the ladder is installed in the screed during casting. In an apartment building is a podium made of polystyrene foam. The application of this method does not increase the load on the floor.
 For the arrangement of the podium will need the following materials:
- mastic or roofing felt
- cement-sand mixture
- sewer pipe
- ladder
- finish
The surface of the planned shower is cleaned of old building materials, dirt and degreased. On a flat slab applied waterproofing. It can be mastic, roofing material or bitumen. Areas that come into contact with water – the floor and lower part of the walls, the coat of the waterproofing composition in 2 layers. All the joints are glued with tape, on top of which is also applied in this composition.
After the mastic has dried, the pipes are connected to sewer. It should be noted that the inclination of the pipe downward in the direction of the sewer pipe from 2-3 degrees.
On the waterproofing layer are placed on the slab of polystyrene, which provides insulation of the foundations and sound insulation for neighbors below. Top plate filled screed thickness of 4-5 cm in a week after the concrete has stiffened, top design and bottom walls lay special tape, then make another layer of screed, but with a slope towards the side drain. Usually do with a difference of 1 cm per meter. The final stage is the laying of the tile.
Laying of flooring depends on the side of the slope. If the location of the drain in the middle, the tile is cut so that it is properly stowed. The location of the drain in the far corner simplifies installation. The floor covering is laid from the ramp to the walls. It is possible to beat the beautiful edging of floor covering or the bottom, using a different color.
For ceiling shower you can use:
- drywall – is the fence from the inner shelves of different sizes. The only caveat – the wall thickness from 5 cm This option is not quite suitable for small bathrooms.
- glass is a practical and frequently used option for areas without pallet. There are different options from ordinary glass is transparent to opaque.
- plastic – easy to clean, affordable. Plastic walls will be used.
- doors from PVC are used for cabins of open type. Move only at the time of adoption of bathing.
Self-Assembly of shower experience possible. Should gradually to study the subject and do not rush, because then I have to remake the system will not succeed. Before starting construction work, a plan of work thought out design of the shower and then purchased the required materials. The original shower area without a tray will delight you with its beauty and practicality for years.


